You will need to create attendance lists to manage employee attendance.
Navigate to: WP-Dashboard → WPHR Attendance → WPHR Attendance
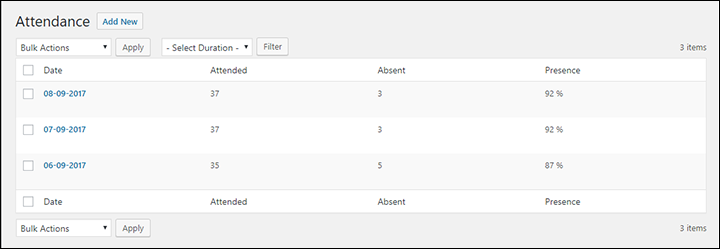
If you have already created any attendance lists, you can view them here.

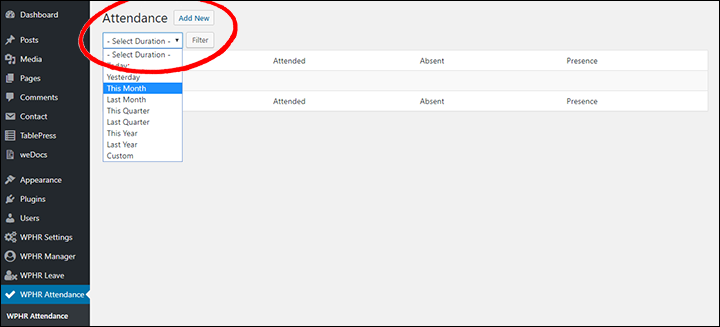
You can select lists from a specific date range using the drop down menu:

Click ‘Add New‘ to create an attendance list for any date (by default the list will be assigned the current date) but you can edit this in the screen before saving. Once saved, you cannot change the date and if you make a mistake you will need to delete the list and start again.
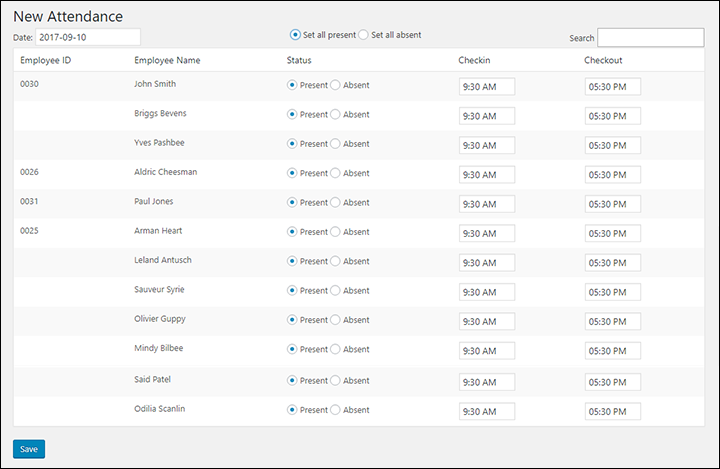
Your new list will display all your available employees and options to record their attendance for that date.

- On the top of this screen you will see a date field which can be edited to the specific day you need.
- Next to this are check boxes for bulk marking all employees present or absent.
- Selecting the Present radio button will set that user to be present for the default office hours.
- Selecting the Absent radio button will set that user to be absent for the default office hours.
- You can also manually input time by clicking on the field.
You can also specify bespoke checkin and checkout times for each of your employees. When you are done with editing, hit the ‘Save’ button.
Alternative Ways to Record Attendance – CSV Import
If you are using an external device to log attendance, you can use a CSV file from that device and import that data into the HR system.
To import from an external device, navigate to Attendance → Import/Export→ Import and select the CSV file.
See more here. https://wphrmanager.com/docs/wp-hr-attendance/5-0-importing/
Reviewing & Filtering Attendance Records
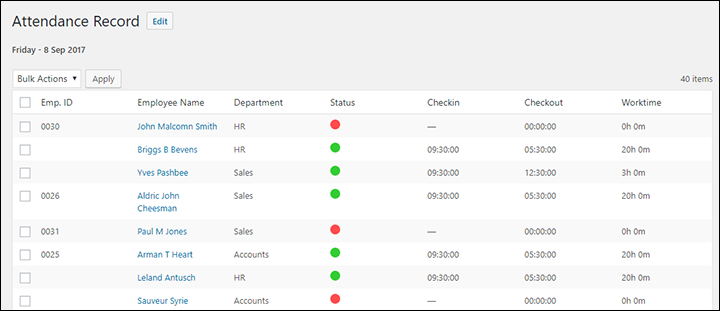
After creating and managing your employee lists, you can review the records of your employees’ attendance. Navigate to- WP-Dashboard → WPHR Attendance → WPHR Attendance and select an attendance list by clicking on the date you require (note as you mouse over the list name an edit option also appears – click this if you need to edit).
You will find the list of your employees, their ID, name, department, status (present or absent), checkin time, checkout time and total work time. There is a bulk action option and from there you can delete records if required.


