6.4.1 Add Locations
If you need to assign different leave policies to employees in different countries or locations this is how to do it.
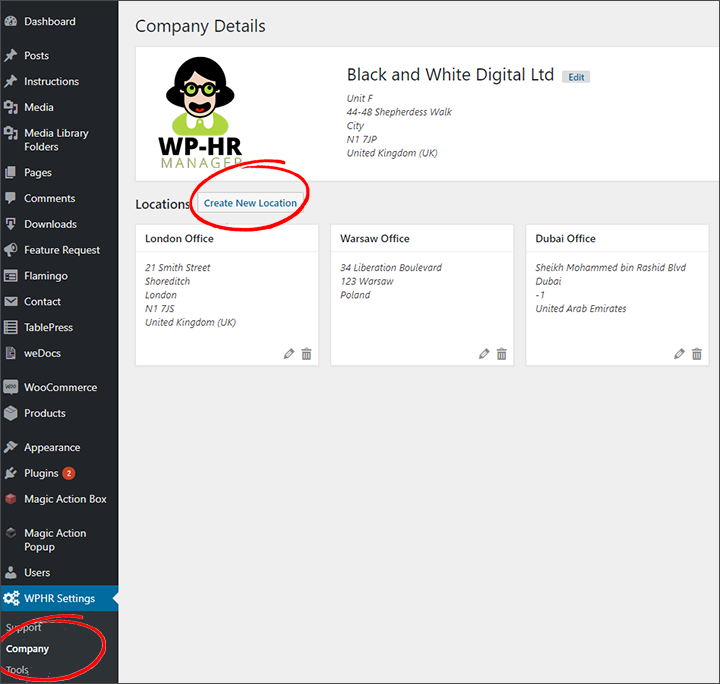
First, go to the sidebar menu and find WPHR Settings => Company
Check you have added the locations you need. If you need to create more locations, just click ‘Create New Location’.
IMPORTANT: If you set up our head office address in the top block shown below (next to the logo), you will need to add the location in the ‘Locations’ section otherwise the system will not calculate and assign your leave policy correctly.

6.4.2 Create New Leave Policy
Now add a new leave policy for the specific location.
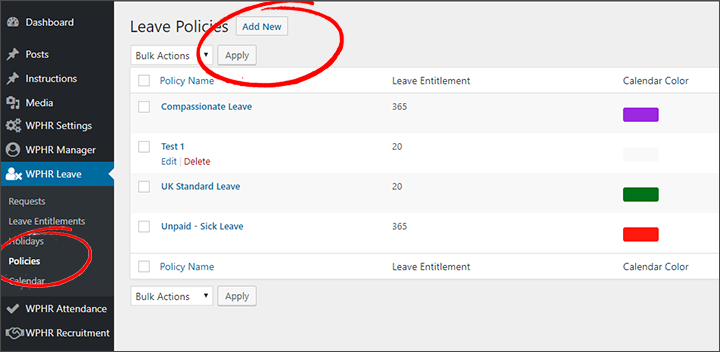
Go to the side bar menu WPHR Leave => Policies = Add New.

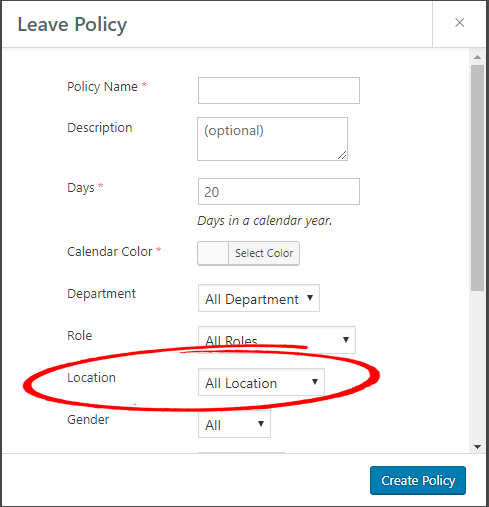
A pop up will appear where you can create the policy. Make sure to complete all the fields (you may need to scroll down).
IMPORTANT – do not select ‘All Location’ – choose the exact location you need.

Once you have set all the fields you need, click ‘Create Policy’.
You can check the Policy has been assigned to all relevant employees by looking in the ‘Leave Entitlements’ screen – you can find this in the sidebar menu WPHR Leave => Leave Entitlements.
6.4.3 Important: Check Employee Locations are Match the Leave Location
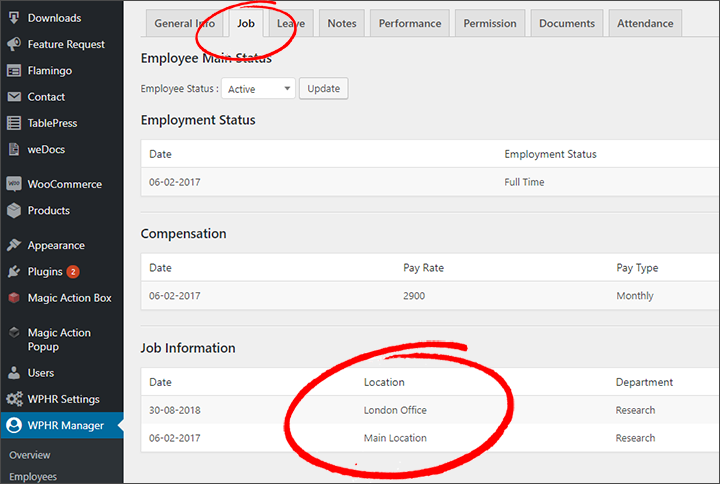
The policy will only apply to employees with the matching location. If it is not working as expected, please check Employee Profiles – you can see the location assigned to an employee on the ‘Job’ tab. (Sidebar menu WPHR Manager => Employees (Select the Employee and then select the ‘Job’ tab).
The location appears in the ‘Job Information’ section and can be amended by selecting ‘Update Job Information’. If ‘Main Location’ is selected change this to the correct location.


