You can import and export data from employees into a .CSV format which is widely used to exchange data and can be opened in Excel and other spread sheet programs.
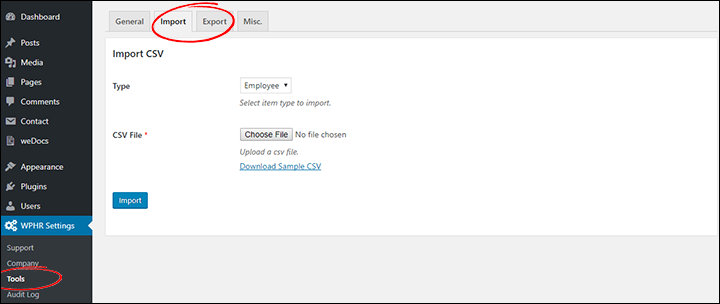
Navigate to: WP Dashboard → WPHR Settings → Tools

Exporting Data
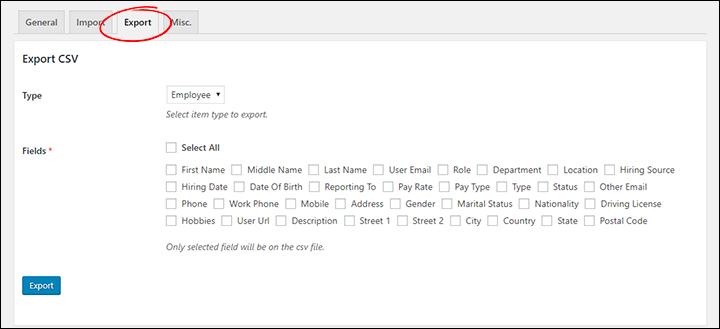
Click on the ‘Export‘ tab. Select the fields you require and click ‘Export’.

Importing Data
You may need to prepare your CSV file in advance. If you export a file from the Export option first, you will have a list of the field names in their correct format. You can paste these to the corresponding column headers in your import file or ‘map’ the fields when you import.
Import fields are case sensitive and some fields may not import if you do not get the format of the data correct. You can download a sample CSV file on the Import screen. The table below should also help you with the field formats.
| Field Name | Record Type | Format | Options |
|---|---|---|---|
| First Name | Name | Text | Any |
| Middle Name | Name | Text | Any |
| Last Name | Name | Text | Any |
| User Email | Any | ||
| Role | Job Function | Text | User defined |
| Department | Department | Text | User defined |
| Location | Work Location | Specified as ID '1', '2' etc | User defined |
| Hiring Source | How they heard about role | Lower Case Text | advertisement, direct, newspaper, referral, social, web, other |
| Hiring Date | Hiring Date | yyyy-mm-dd | Any |
| Date of Birth | Date of Birth | yyyy-mm-dd | Any |
| Reporting To | Manager | Specified as ID '1', '2' etc | To find ID go to Employee profile and look in URL |
| Pay Rate | Pay | Numeric | Any |
| Pay Type | Pay Type | Lower Case Text | hourly, daily, weekly, biweekly, monthly, contract |
| Type | Employment Type | Lower Case Text | permanent, parttime, contract, temporary, trainee |
| Status | Employment Status | Lower Case Text | active, terminated, deceased, resigned |
| Other Email | Any | ||
| Phone | Phone | Text | Any |
| Work Phone | Phone | Text | Any |
| Mobile | Phone | Text | Any |
| Address | NOT USED | n/a | n/a |
| Gender | Gender | Lower Case Text | male, female, other |
| Marital Status | Marital Status | Lower Case Text | single, married, widowed |
| Nationality | Nationality | Country Code | eg. GB, US, PL |
| Driving License | Driving Licence | Text | Any |
| Hobbies | Hobbies | Text | Any |
| User Url | Personal Website | URL | Any |
| Description | Biography | Text | Any |
| Street 1 | Address | Text | Any |
| Street 2 | Address | Text | Any |
| City | Address | Text | Any |
| Country | Address | Country Code | eg. GB, US, PL |
| State | Address | State Code | eg. AK |
| Postal Code | Address | Text | Any |
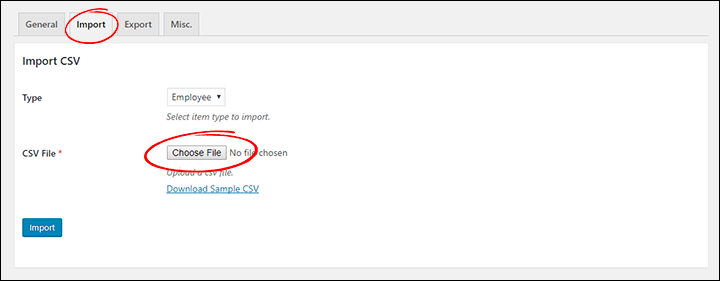
Click on the ‘Import‘ Tab.
Click ‘Choose File‘ and locate the CSV file you wish to import.

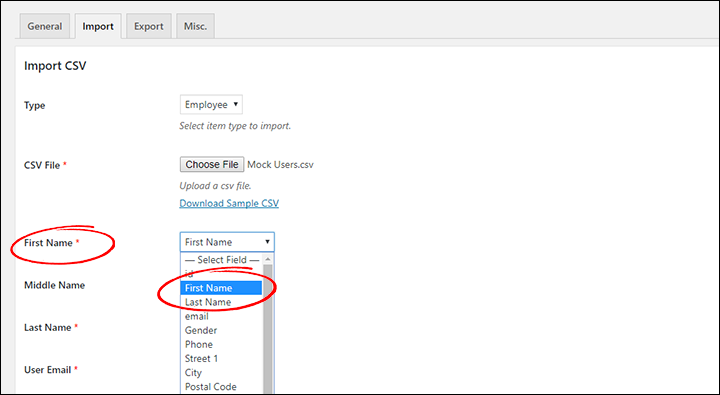
When the file has imported you will see a list of fields in the left hand side of the screen and matching drop-down boxes on the left. The system will try to match your CSV file fields to the correct fields in WP-HR Manager but you can adjust the mapping here if it is incorrect.

Once you are certain the fields are correctly mapped, click ‘Import‘ and your records will be created.


